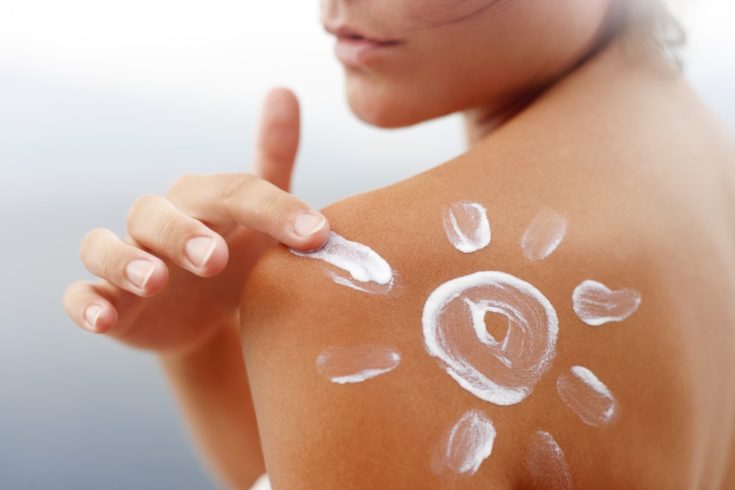
Half the time I spray on or slather myself with sunscreen I end up feeling like I was fried due to some ingredient I didn’t even know I had a sensitivity to. Although I do have a few go-to sunscreen brands I can count on, I prefer to know exactly what I’m putting on my skin since I can’t pronounce half of brand name ingredient lists.
Luckily, making your own DIY natural sunscreen couldn’t be easier, and contains powerful, protective ingredients that work as an effective sunblock. It also has some soothing, anti inflammatory, and antibacterial oils to hydrate and heal your skin while you wear it. If you are curious about how to make natural sunscreen, the directions can be found below:
The Importance of Sunscreen
Sun damage isn’t anything to scoff at. It dries your skin, speeds up aging, darkens pigments, and can even cause irreversible damage and certain types of cancers. Even one sunburn can increase your risk of melanoma, a serious cancer that can be deadly if left untreated.
The sun radiates different types of UV rays. These aren’t responsible for the heat you feel, as that is caused by radiant energy and cannot burn you. UV rays are present even on cloudy days, which is why you can still get a sunburn even if you never felt as if you were getting burned.
UVB rays stay close to the surface of your skin and are responsible for the sunburns you may get. It is damaging on a surface level, but generally you recover quickly from this. UVA rays penetrate deep into the layers of your skin. Although not responsible for the sunburn as much as UVB rays, it does more damage overall, speeds up aging, and causes your body to work overtime to try and heal the damage. Together they are a formidable pair and create very unpleasant, long lasting problems.
Sun Protection Factor

The sun protection factor, or SPF, of your sunblock, is an important term to pay close attention to. It isn’t just the number that is represented, but the spectrum protection it is providing as well. Many sunscreens offer strong UVB protection, but lacks in UVA- meaning you might not get burned, but you aren’t protecting your skin on a cellular level. You want to find ingredients that provide strong broad spectrum coverage, meaning both UVA and UVB is being protected against.
You also should be aware of how SPF works. Sunscreen is just that, a screen, and not truly a block. The number represents how much UV gets through so you understand how much protection you are getting. For example, a 30 SPF rate allows one thirtieth (3.3%) of UV to get through- meaning you are 96.7% protected. This also means it takes 30 times longer to burn than what you normally would if you had nothing on.
Active Ingredients

There are various active ingredients that can be used to help protect your skin with some being much more protective than others. Chemical sunscreens are designed to absorb the sun’s rays and convert them into a less harmful substance. These are easy to rub or spray on your skin, but may not be as effective as more organic options. They also have a high incidence of complaints surrounding skin sensitivities.
Organic, physical ingredients work like a shield to deflect the sun’s rays. These almost exclusively contain zinc oxide or titanium dioxide. They are gentle on sensitive skin, are highly effective, and are considered some of the best you can use.
Unfortunately, many people avoid these products because they can’t find something for oily skin and are avoiding breakouts, or prefer a brand without zinc oxide because they don’t like the white residue. But all you are doing is damaging your skin and for no reason other than you haven’t looked for what works best for you. The recipe below is made to address both these issues so you no longer have an excuse to go without.
What You Need:
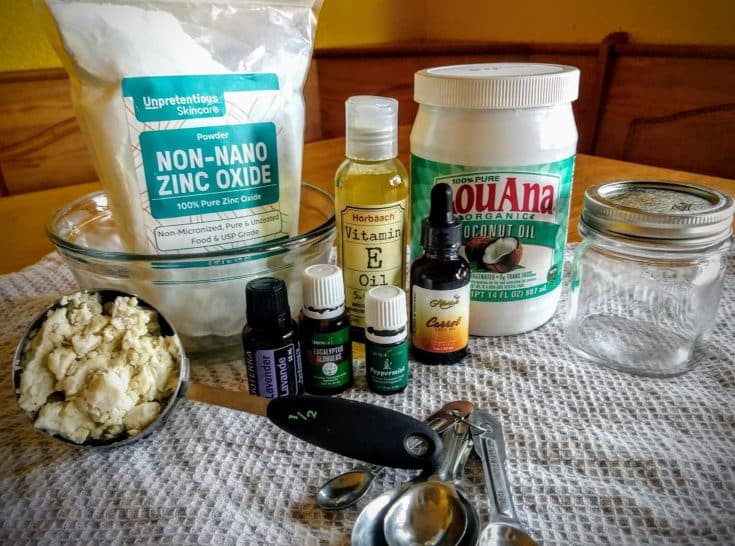
Almost all the following ingredients contain SPFs of various strengths. Combined, they make an awesome skin barrier that I use exclusively on myself and my own children. After I burned horribly twice this last summer using various popular brand names, I finally said no more. Whatever sensitivity to an ingredient works to magnify the sun, and where my kids don’t even get a tan line, I absolutely fry. I figured there was a better go to which made me research various recipes.
I like this one because it is skin hydrating, smells great, and absorbs into the skin. It also doesn’t leave a thick white layer (although you can add more zinc oxide for more protection). With an approximate SPF of 30+, I find we can easily reapply every 90 minutes or so for awesome protection.
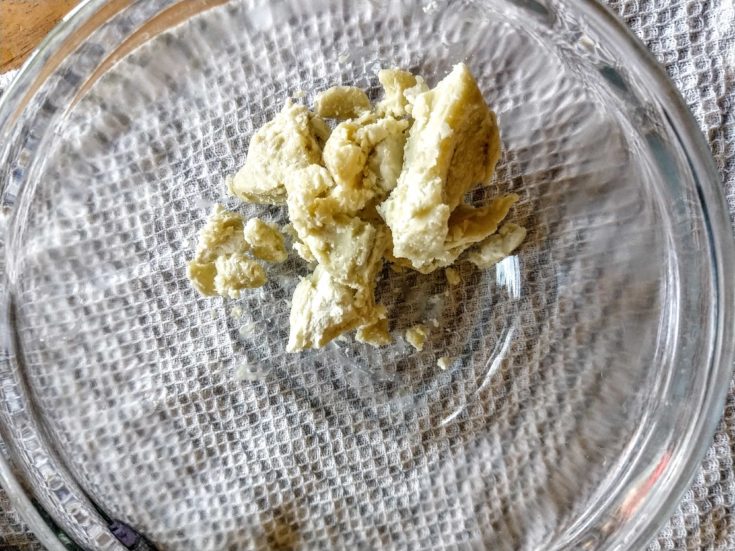
½ cup Shea Butter
Shea butter is a hydrating choice that provides an excellent base to create your lotion. Choose a lighter color for less scent and a whiter lotion color. It also has a natural SPF of about 6.
½ cup non-fractionated Coconut Oil
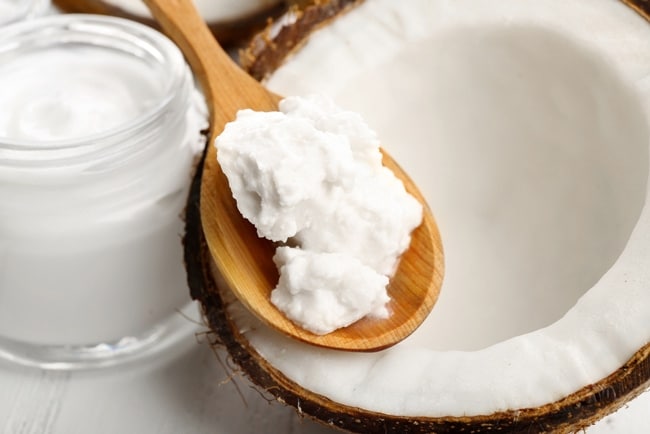
Coconut oil has a natural SPF of 4, is an excellent preservative, and serves to help create a smooth, hydrating lotion application.
2 teaspoons carrot seed oil
Carrot seed oil is from the common flower, Queen Anne’s Lace and has powerful antioxidant, antibacterial, anti inflammatory, and antifungal properties. If that wasn’t enough, it also has a natural SPF of 38+.
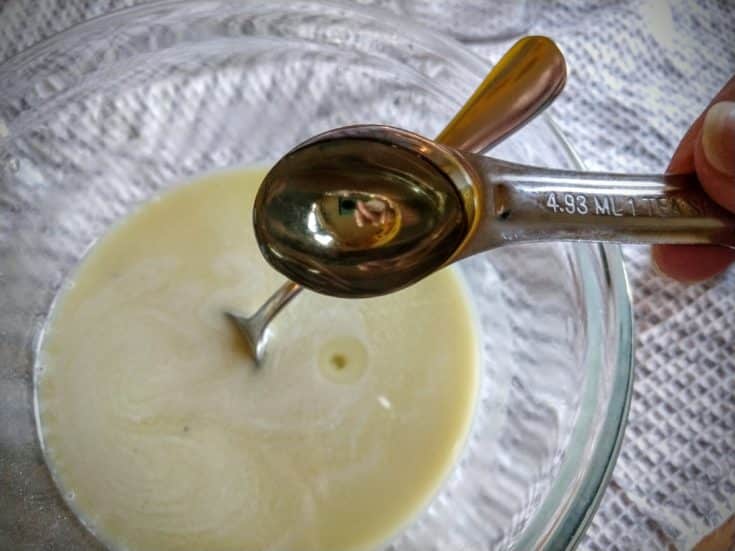
2 teaspoon vitamin E oil
Vitamin E oil helps absorb harmful rays and scatters them to protect your skin. It also is highly beneficial, moisturizing, and healing.
6 Tablespoons non-nano zinc oxide powder

Non-Nano zinc oxide is incredibly fine to easily absorb liquid ingredients and smooth over your skin to form a great barrier. It also doesn’t leave behind such an obvious white layer and blends in nicely.
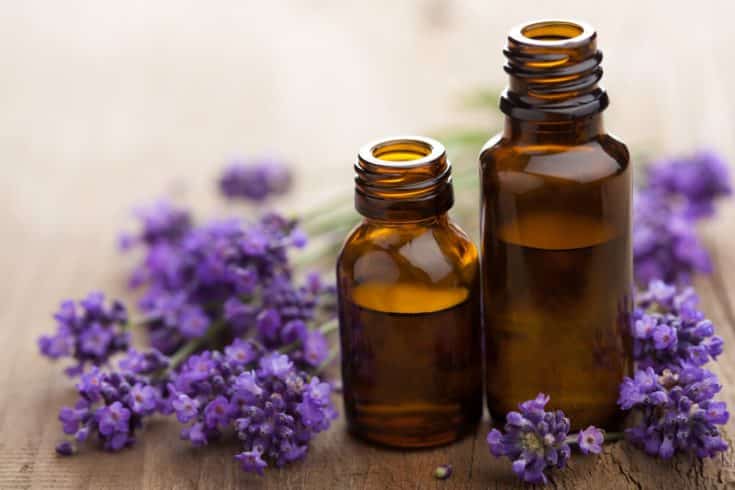
30 drops essential oils: 15 lavender, 10 Eucalyptus, 5 peppermint
Each of the above mentioned oils have been found to have various SPF protection levels. Although low, and not suggested to use on their own, when mixed with other ingredients it helps support skin’s health against harmful UV rays, provides beneficial properties, and smells great! Many various oils can be used, but always avoid citrus oils as they can cause photosensitivity. If in doubt you can skip this step, or use the ones I’ve provided.
Always use brand oils that provide transparency to what, exactly, is in their oils, third party testing results, and purity claims. You never want to find out you saved some money but exposed yourself to a blend that was not conducive to skin protection.
To measure for SPF:
Keep in mind you can adjust your SPF based on the amount of active ingredients you have. Since zinc oxide is your strongest, most active barrier, you want to use it as your foundation of protection.
Make 5% of your entire measurement of ingredients your active ingredient for an SPF of 5. That means 10% provides SPF of 10, 20% provides an SPF of 20, and so on and so forth.
Step One: Measure Shea Butter into Glass Bowl
Good, organic shea butter comes in chunks and brinks, but slices easily with a butter knife. Cut what you need and press firmly into the measuring cup for a more accurate measurement. I have a tendency to eyeball my ingredients once I am familiar with a recipe, but if you are concerned about exact measurement, you can always soften it in the microwave so it packs together more closely, or even weigh your ingredients with a kitchen scale (½ cup = 6 ounces).
Step Two: Measure Coconut Oil
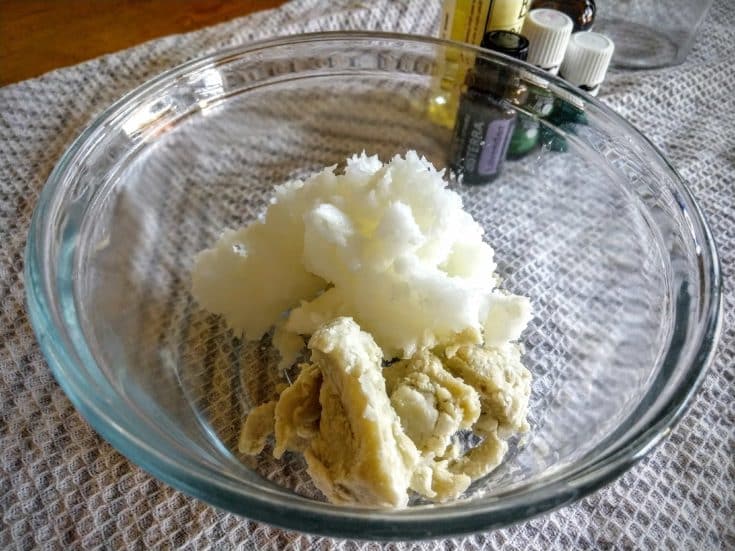
Making this with Coconut oil provides the perfect pairing as it is much like Shea Butter and is soft and malleable. Measure a ½ cup and put into the bowl with the Shea. If it is under 78 Degrees it is in a solid state, and much easier to work with, but if it is warm where you are working and it has melted, no worries. It will solidify eventually (you melt it anyway in the next step).
You definitely do not want to use a fractionated (permanent liquid) coconut oil for this recipe as you want a thicker lotion that melts on contact with your skin to adhere effectively.
Step Three: Melt Above Ingredients Together
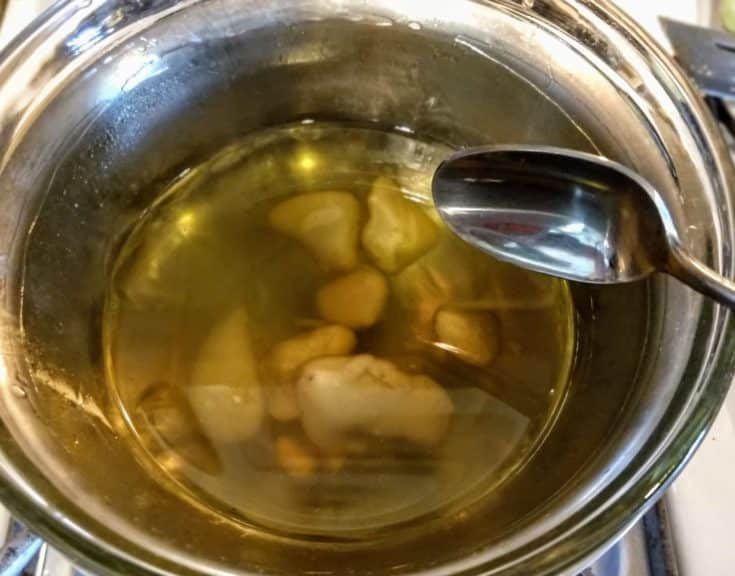
You can use a double boiler for this step or simply place the glass bowl over a pan with a few inches of water in it. I actually prefer this method for these type of ingredients despite having a good double boiler. The heat seems to be more uniform and the melting is easier to control without creating any surprises. Plus, I have one less thing to wash.
Once your shea butter and coconut oil is almost melted, or as soon as the last bit is disappearing, be sure to promptly remove it from the heat. You can leave it over the pan or take out the bowl- the choice is yours. Just be sure to use hand protection and place a warmer down to avoid scorching a countertop.
Step Four: Stir in Zinc Oxide

Honestly, you can add the rest of the ingredients in any order, but I like stirring in the zinc oxide while the mixture is still pretty warm. You’ll see it begin to dissolve and dissipate quickly and a few brisk stirs should get it all well blended. There will always be a little bit of powder residue on the bottom, but I always shake it up well once I have it in a jar and the mixture is cooler.
Step Five: Add Carrot Seed Oil
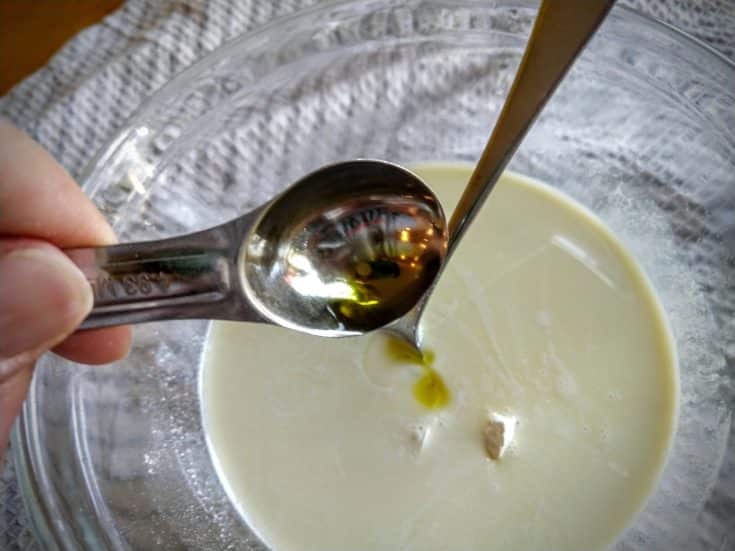
Carrot seed oil is pretty yellow in color, but it doesn’t affect the end result at all. You’ll be able to smell the goodness of this oil as soon as you unscrew the top- it is rich and warm smelling and is full of skin benefits as mentioned above. Give it a good stir.
Step Six: Add Vitamin E Oil
Add in your Vitamin E oil as well and stir into the mix. Keep scraping up the bottom to help the zinc oxide from settling too much and dissolve further in the melted ingredients. This oil is incredibly nourishing to your skin, so if you want to add a little extra, it won’t hurt any.
Step Seven: Add in Essential Oils
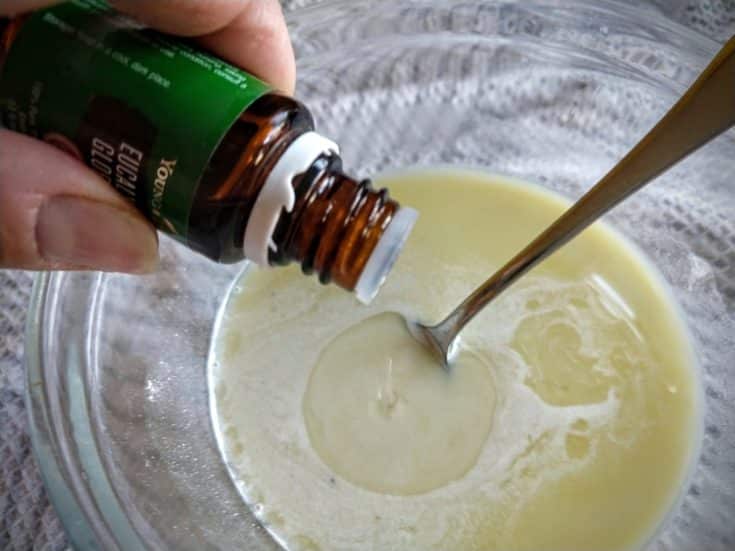
Add in your oils for the perfect scent combination and added skin benefits. Lavender works against skin redness and irritation, and is healing in nature. It is used to treat a variety of skin conditions as well, making it perfect for sensitive skin. Eucalyptus eliminates harmful bacteria and is a clean, healthy option as well that aids in healing and is gentle on skin despite the strong, heady scent it gives off. Peppermint works much the same way and cools and soothes the skin despite the strong scent.
You don’t have to make this with essential oils if you don’t want. You can always opt to have it scentless as well.
Step Eight: Pour into a Glass Jar
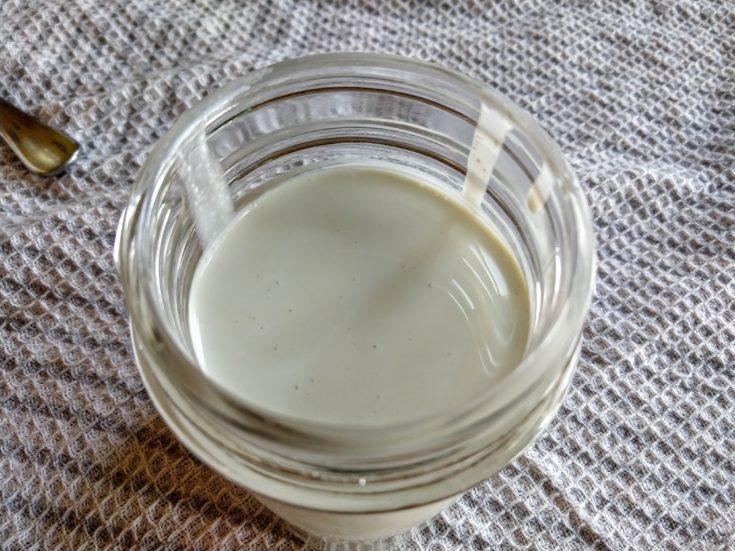
Once you have all your ingredients well blended, pour it into a glass jar. The measurements I’ve provided above make approximately a cup of lotion that will last a few full body applications since a little goes a long way. If any zinc oxide has settled, just scoop it into the jar as well rather than waste it.
Shake Vigorously
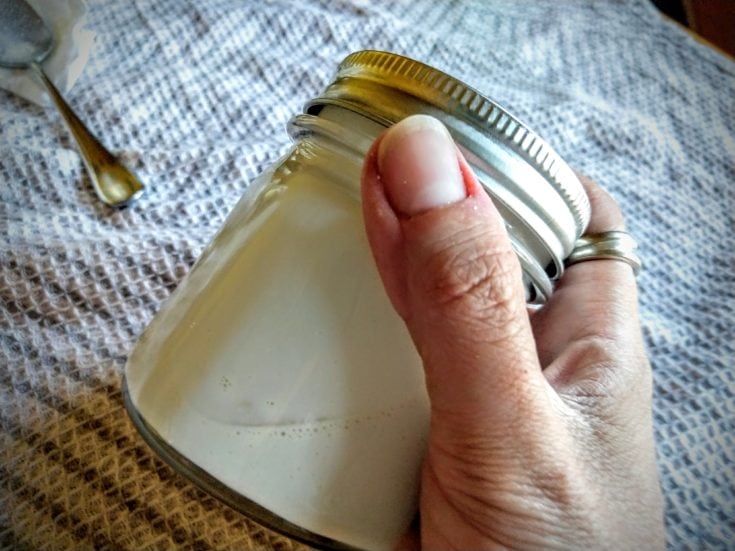
I also give my ingredients a vigorous shake once I’ve sealed it to further mix all the ingredients and get them ready to cool down. Don’t shut the lid if the liquid is still quite warm as it will seal the jar quite tightly. Rather, let it cool to room temperature before doing this so you don’t have to strain to open the jar again (I’m speaking from experience!).
How to Store and Use
Keep your sunscreen in a cool, dark area when not in use, and when you travel put it in a bag with a cooler brick to keep it from melting if you are heading out for a hot day in the sun. I like to keep my stored in the refrigerator. The mixture should be good for much more than six months this way (and probably longer), but it doesn’t last long if you are using it each time you head out in the sun.
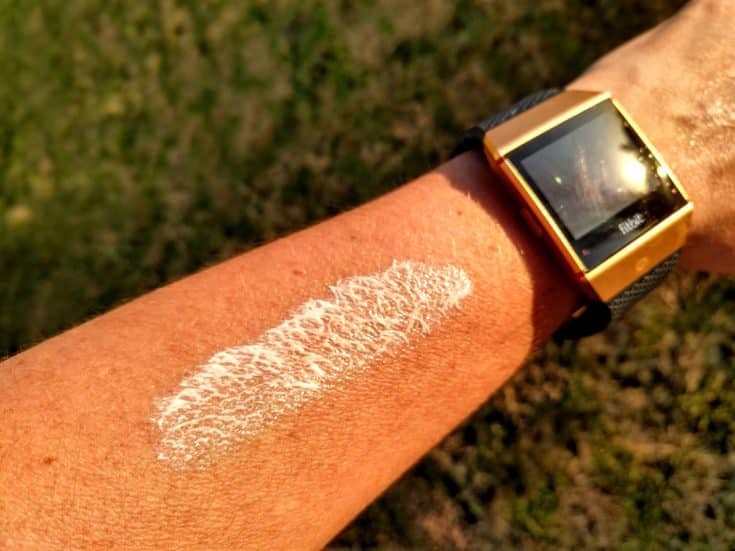
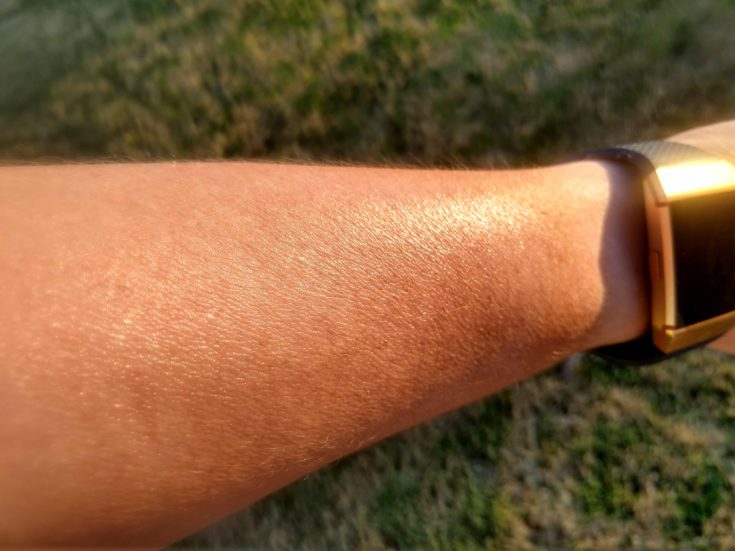
Apply as you would any other product of this type and reapply after every 90 minutes to two hours. It scoops easily with your finger and melts on contact with your skin, but doesn’t create a runny, messy surface. Once on you can massage it into your skin, and, as you can see, it doesn’t leave a white film behind at all. It also isn’t oily and feels as if you simply applied a lotion to your skin.
Conclusion
Even if you aren’t like me and don’t suffer from sensitivities to certain ingredients, you might as well invest in the 20 minutes or so it takes to make your own sunscreen at home. This way you know exactly what you are placing on your skin and can control the amount of SPF you are getting. The cost of the above ingredients makes much more than what you would purchase in a store as well, allowing you to have fresh, active sunscreen on hand at all times of the year.
If you have any questions or comments, we’d love to hear from you below. And, as always, please share.
The post How to Make Natural Sunscreen: Protect Yourself for a Fraction of the Cost appeared first on Better Mind Body Soul.
No comments:
Post a Comment